Little tin decorations tutorial
These little tin animals are so easy to make and would make a lovely addition to the decorations on the tree. I have used craft tin foil, which is quite easy to get hold of from craft supply shops. I have also used the foil from disposable containers and platters before. It works just as well. Be careful when cutting the foil, as it is sharp. This is not a project for children.

You will need
Craft stamping foil
Paper templates. You can draw your own or use the ones I have drawn up.
Scissors [do not use your best scissors. I keep a pair of my paper scissors especially for cutting foil]
Something sharp like a bradawl to make a hole in the tin.
String
A ballpoint paper scorer or an old ballpoint pen that has run out of ink
step 1
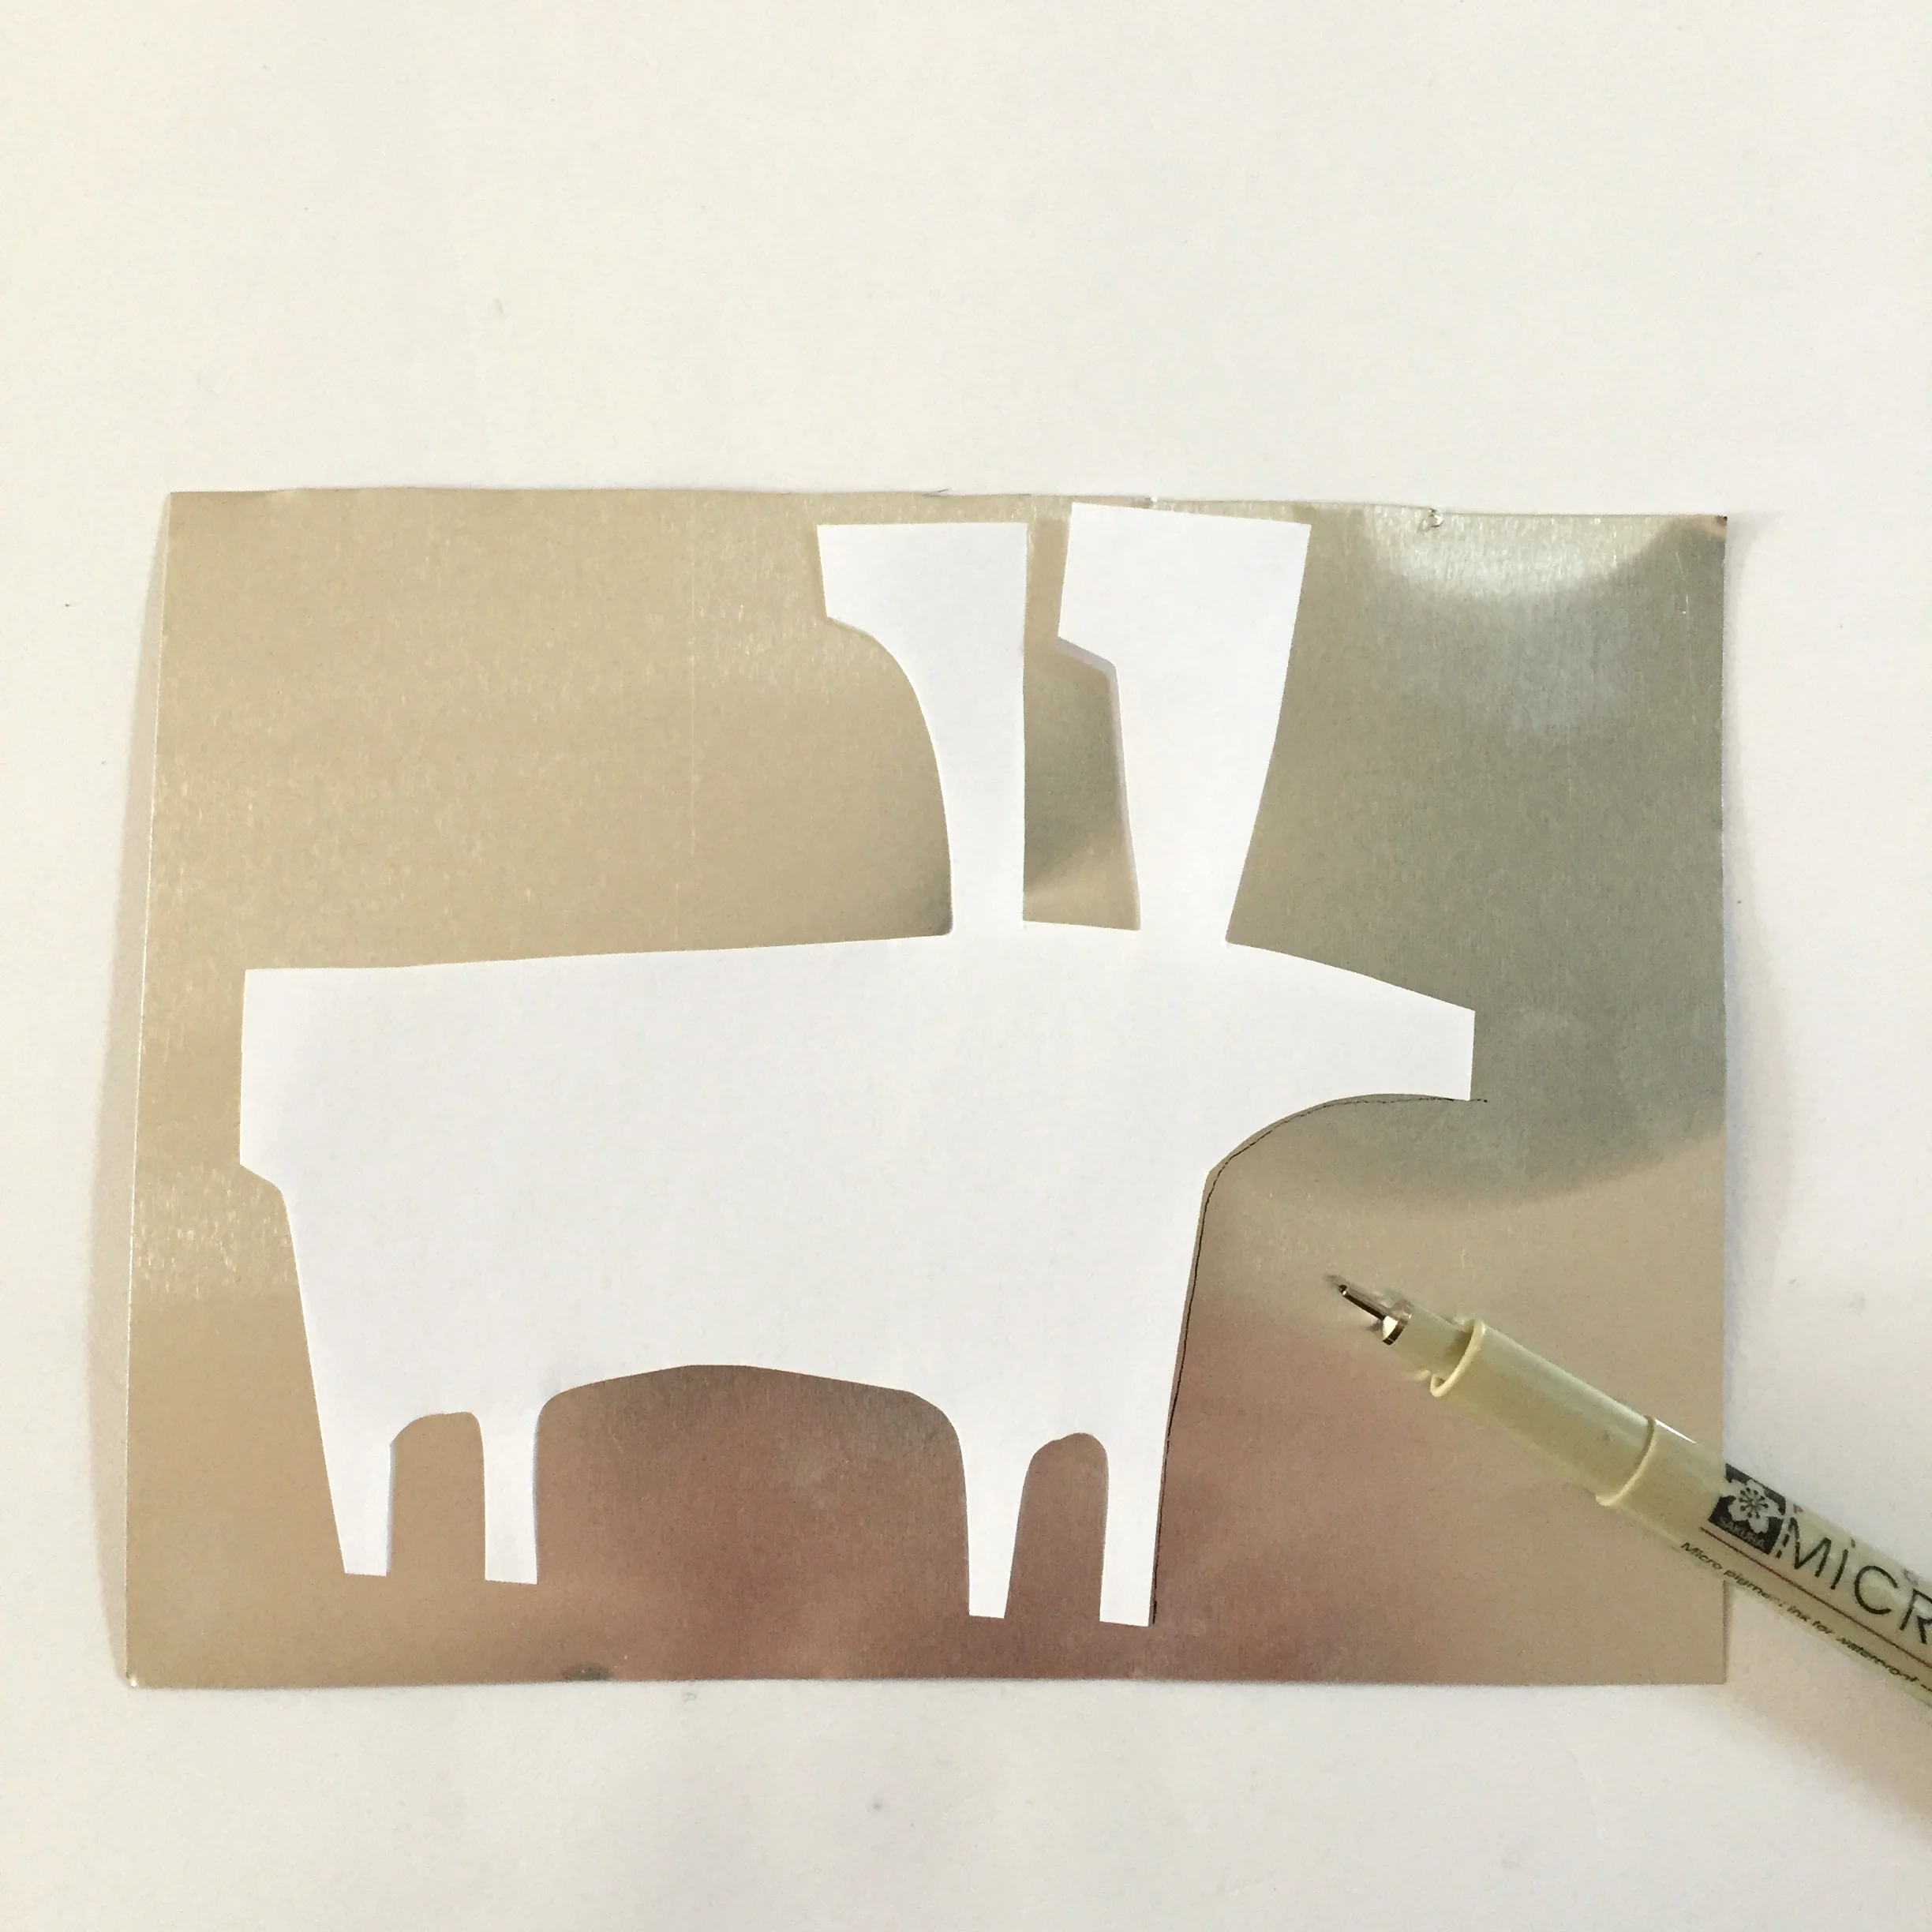
Cut out a template and place it down on the tin Draw around it with a fine pen.
step 2

Cut out the tin, taking care with the sharp edges.
step 3

Use the scorer or old ballpoint pen to draw patterns onto the back of the tin. Press firmly to get a good indentation. I like to go around the edge of the shape with a continuous line, approx. 2mm in from the edge and then fill in the middle sections.
step 4 & 5
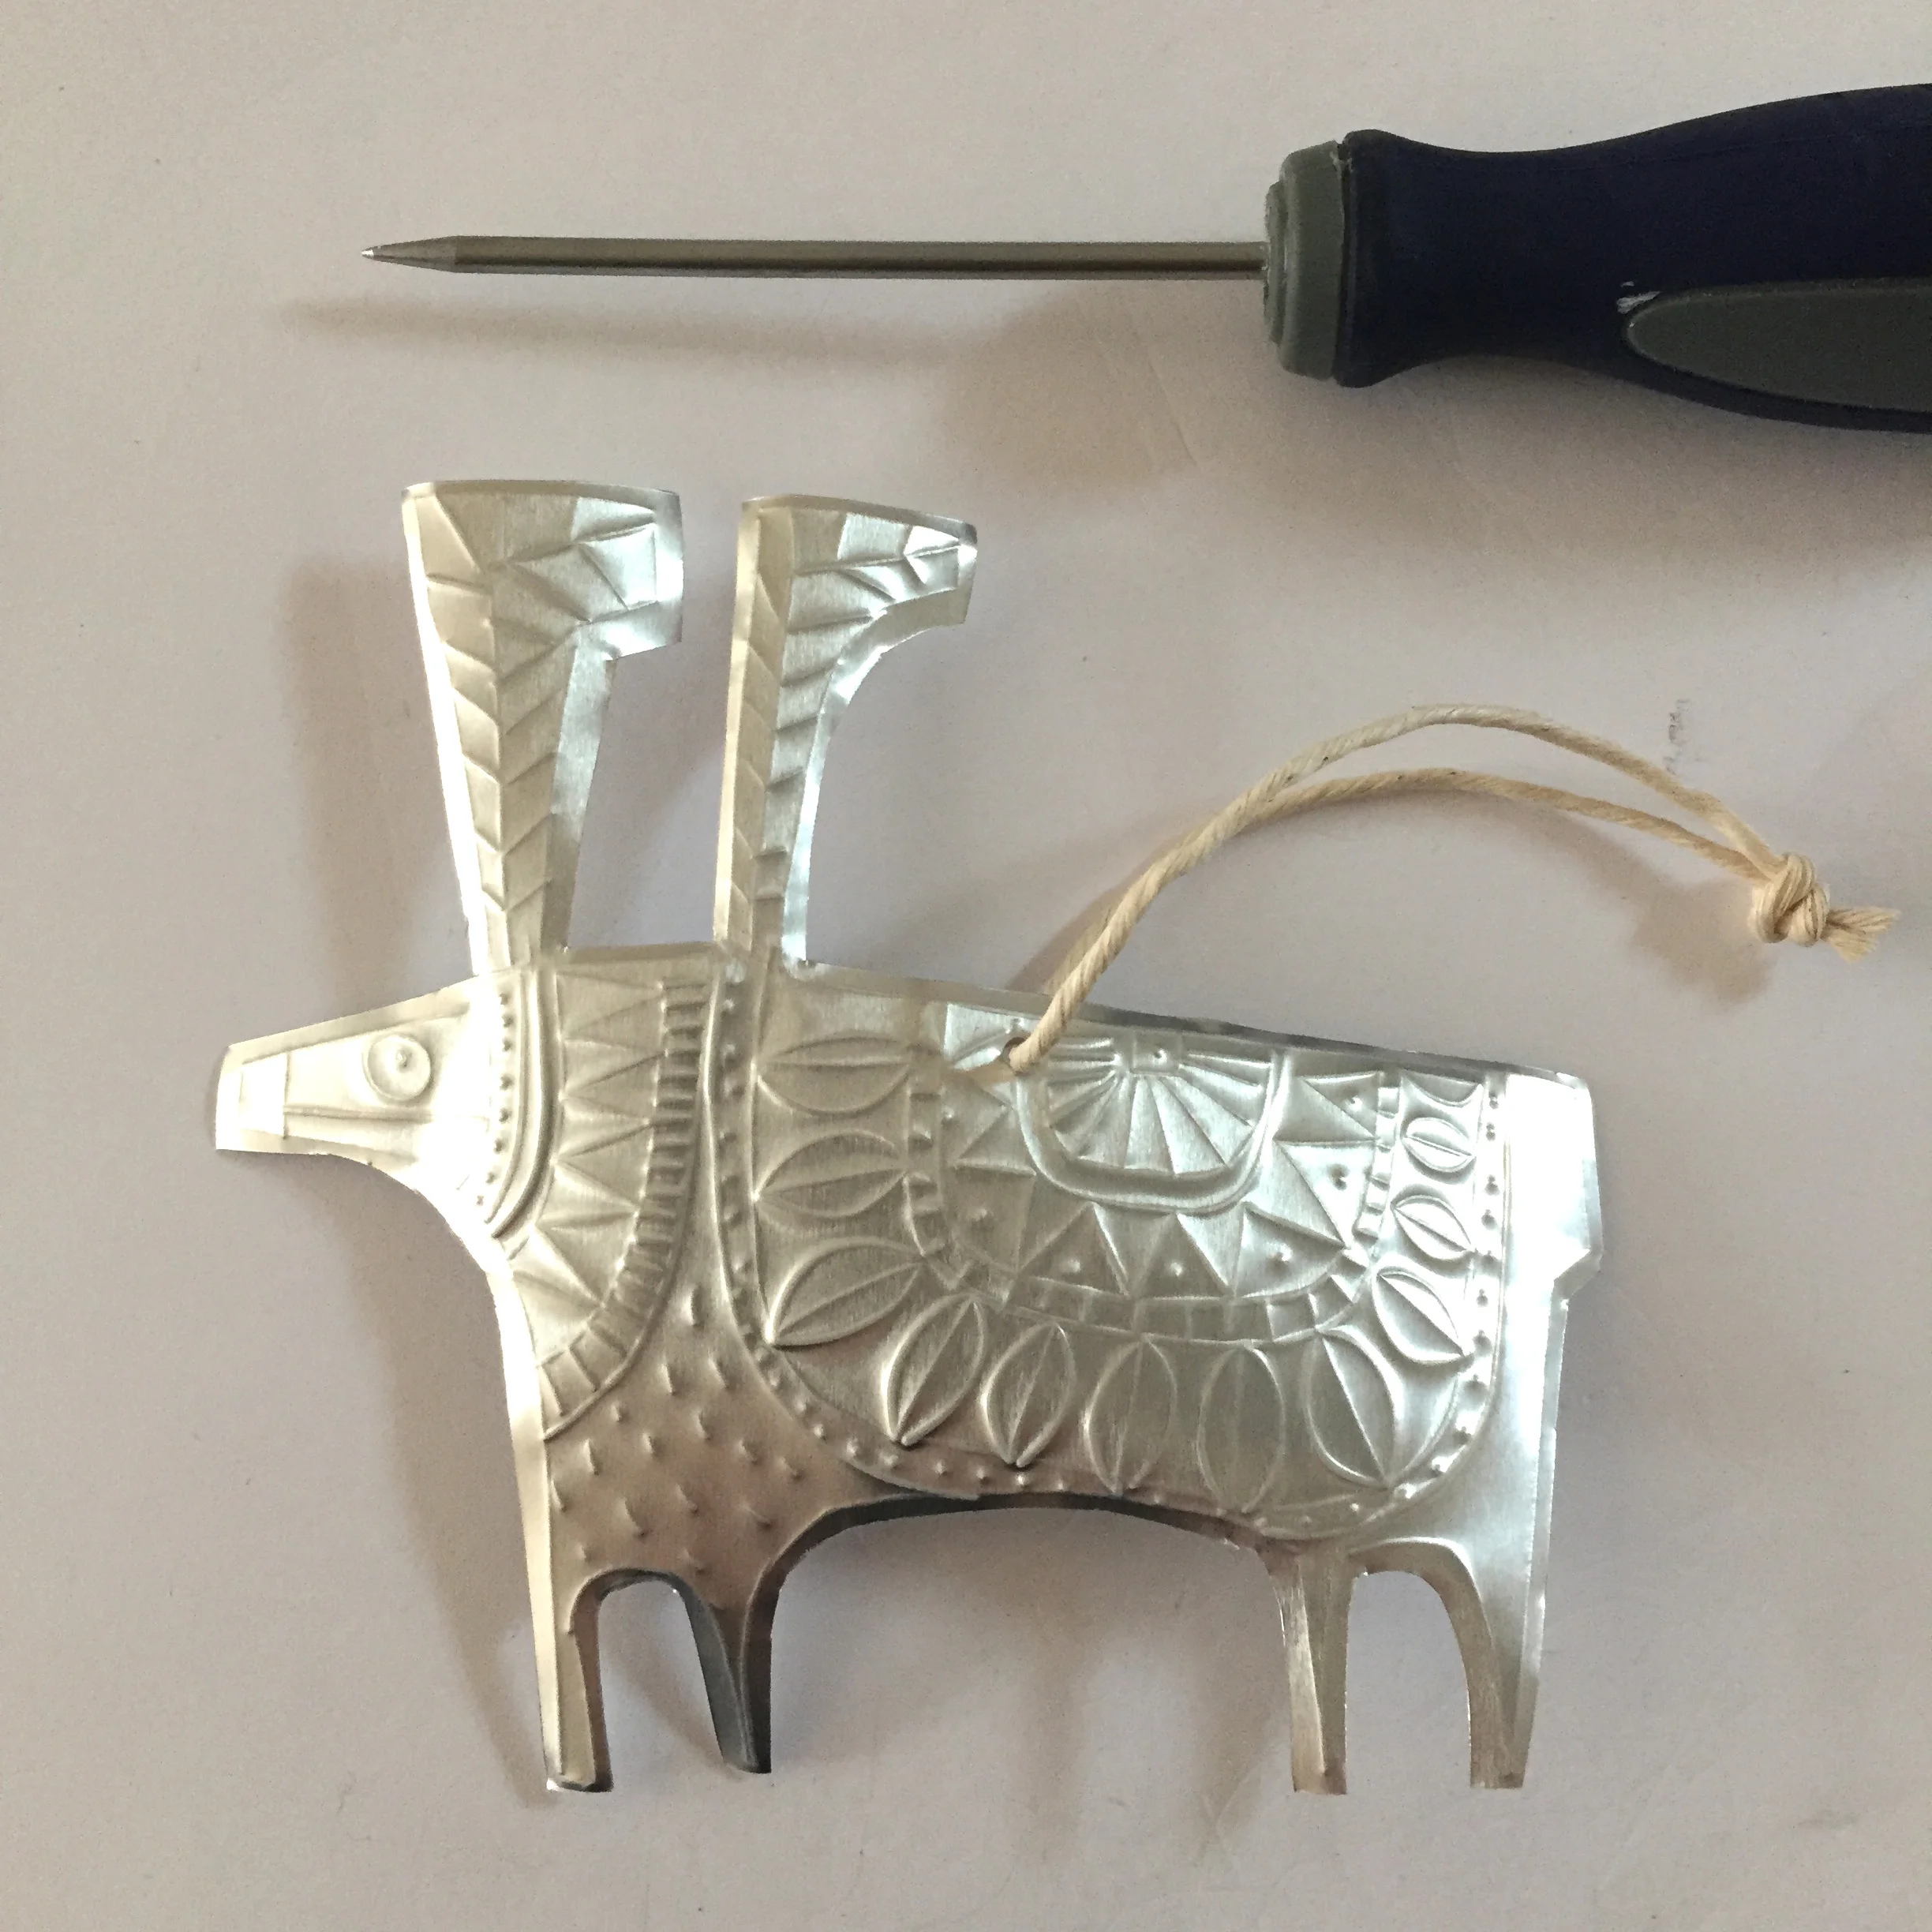
4. Use the bradawl to make a hole in the tin. Place it on an old magazine of thick card so that you do not mark the surface you are working on.
5. Place some string through the hole. Tie a knot and you decoration is ready to hang!